Lay-Up Procedure
You are now ready to do the lay-up procedure (combining the fibreglass with
the resin to create a strong matrix). It is not important which half is layed up
first, however the windward side is an easier and faster process.
It is important to lay up all the pieces in one run. If the resin on one layer is
allowed to cure (go hard) before the next layer is applied, extra resin is
required for the bottom surface of the materials. This increases the weight and
reduces the strength due to a lamination between the two layers of resin.
Activate first batch of resin (‘outer layer resin’) by mixing in hardener.
Using paint brushes apply a thick layer of ‘outer layer’ resin to the mould.
Ensure resin is smoothly applied to all parts of the surface - any places
without resin will show up on the outer surface of the final piece as a ‘dent’ in
the surface.
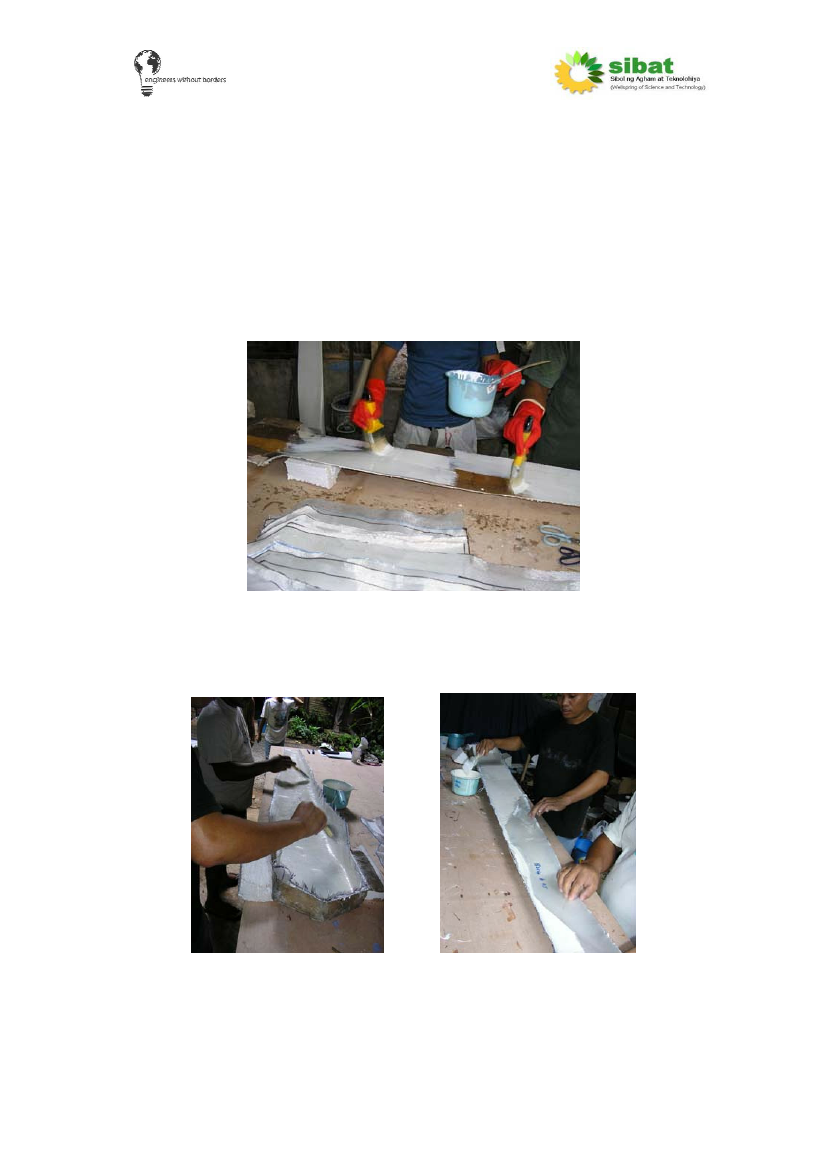
Add the first layer of WC. This should be a 90º piece.
The material should be positioned by hand (using gloves, unlike shown here)
before consolidating with a brush. This requires a 'stipple' action - press the
brush into the fibres, do not use a 'brushing' action! One person should begin
at the root, consolidating the material (stippling the fibres with a brush to pull
through the resin applied to the mould surface - no additional resin is required
22